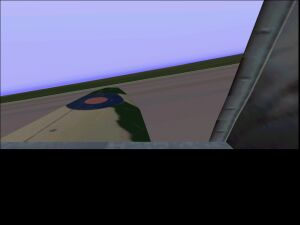
BLACK (OR GREY) WINDOW SYNDROME
Ever installed a panel to find the windscreen
is black & you can’t see out?
 |
 |
|
BEFORE
|
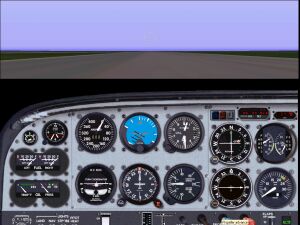
AFTER
|
CFS PANEL CLINIC
| FIXING COMMON PROBLEMS
WITH IMPORTED PANELS |
|
One of the features I like most about CFS is the 3d panels. They're a major improvement on the flat 2d panels in FS98. Many people experience problems during their first attempts to install FS98 aircraft & panels to CFS mainly due to this feature. Most FS98 panels can be easily reconfigured to work in CFS but some are totally unsuitable. Similar questions
crop up time after time on the subject so I thought I’d write this in
an attempt to answer the most common ones. If you recognise one of these
problems & would like to rectify it, why not print this out &
give it a try. It’s surprisingly simple. |
|
|
|
Note: If you have this problem with panels of all
imported aircraft please try this first. Find COMBATFS.CFG
in the CFS main folder. Open COMBATFS.CFG in Notepad & scroll down
until you see the PANEL_MASKING_OFF=
entry under [PREFS] |
|
Start your favourite paint program &
find the main panel bitmap in the panel which has the problem. CFS uses the pixel in the 0,0 position,
that’s the extreme top left pixel, to determine the colour transparency
of the panel. True Black is identified as: red=0,
green=0, blue=0. That's it. Exit the paint program, saving
changes to the bitmap, fire up CFS and try it. |
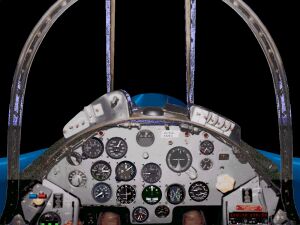
BLACK BAND SYNDROME - PANEL LOCK-UP |
|
This is where you see black bands at the bottom of the screen in side views. The forward view might also look wrong. Some examples can cause noticeable lock-up problems. It happens mainly with imported aircraft aliased to the CFS Converter panels & imported FS98 panels.
(It depends on how they're configured. This problem can also be fixed but it's more complex & not part of this tutorial.) If you can type an E-mail you can do this. I can do it in one minute flat. Here’s how: Go
into the CFS Aircraft folder & open up the panel folder of the aircraft
you’re having problems with. |
|
If there’s only one file in the Panel folder it should be named panel.cfg. This tells you the aircraft does not have its own panel but shares an existing one with another aircraft. To find out which one, open panel.cfg in Notepad. (Let Notepad become the default program for .cfg files, saves time.) You should see something like this:
The panel is aliased
to one of the CFS Converter panels in the CFS\Aircraft\fsfsconv folder.
alias=P51d\panel Exit Notepad, saving changes.
Your aircraft will now use the default P51d panel. Be careful, as it won’t work if you make a mistake. Your plane may not even show up in CFS. |
|
The panel folder of an imported panel
should contain a panel.cfg file & one or more bitmaps. (There may be more Window Titles but ignore them for now.)
To convert the panel to CFS 3d mode &
get rid of the black bands, modify it like this:
|
|
That’s that. Now scroll down to the very bottom of the page. You should see something like this:
This is most important. If it’s not there,
type it in. The first four lines need to be exactly as shown. The fifth, SIZE_Y,
controls how far the outside view window extends down the screen. Under no circumstances go higher than
SIZE_Y=6150
Right, if you’ve done that, exit Notepad saving the changes. Fire up CFS & try it, I hope you’ll notice the difference. |
© Grumpy's Lair 2002